
Configure an escalation policy
Build, attach, and test ordered incident notification steps.
An escalation policy defines who OpsKnight contacts, through which personal channels, and how long it waits before trying the next step. Only Admins can change policies. Authorized Responders and Auditors can view them.
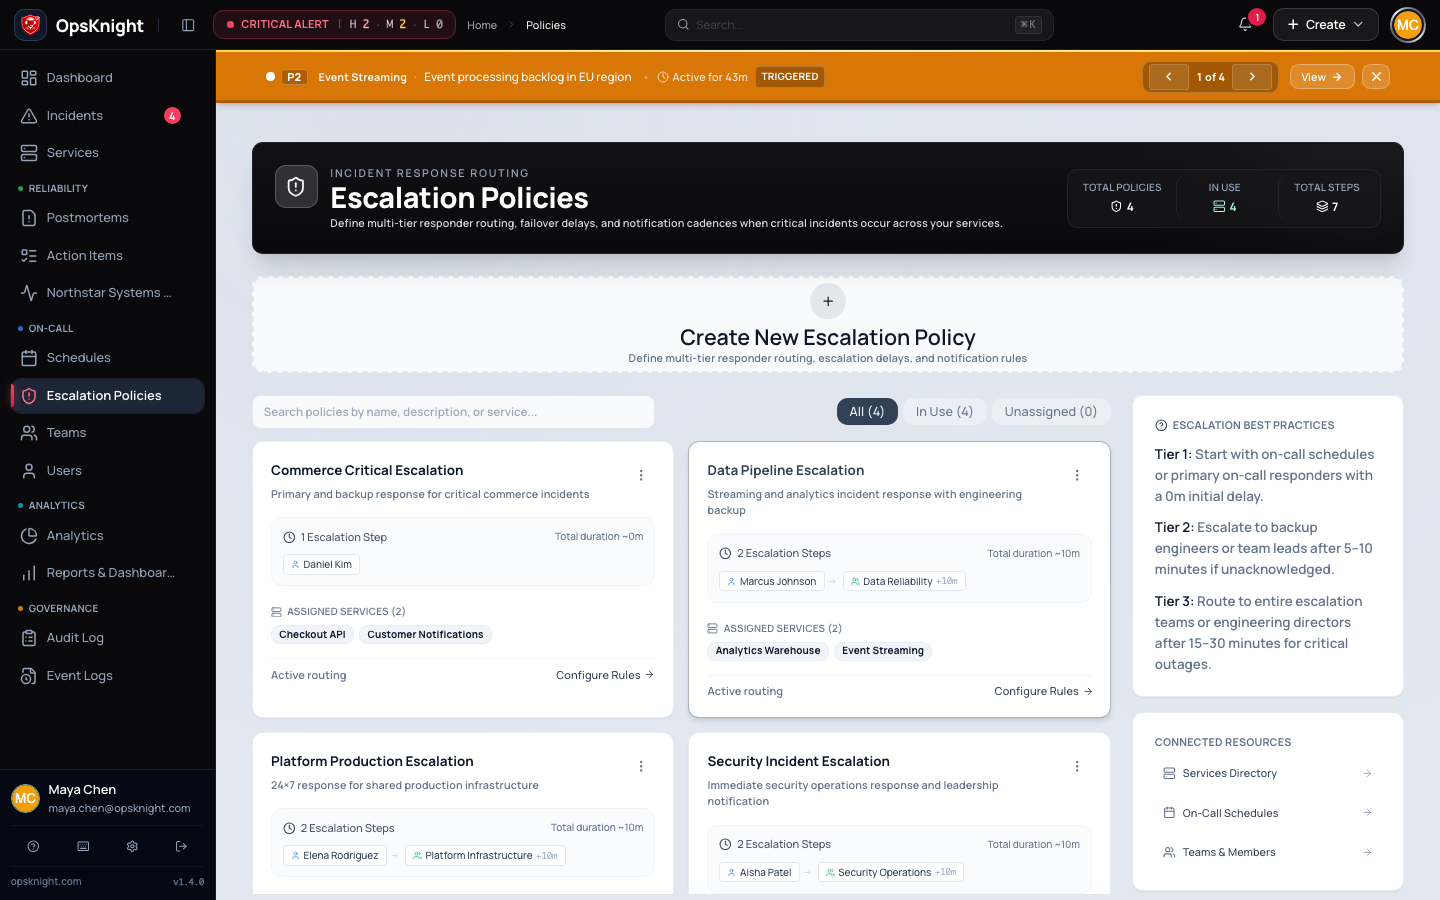
Before you begin
Prepare the targets:
- a User must be an active Admin or Responder;
- a Team needs active members, or an active lead for lead-only notification;
- a Schedule needs effective coverage when an incident may page.
Verify responder preferences and destinations too. Selecting SMS cannot deliver to a responder without an enabled, usable SMS endpoint.
1. Create the policy
- Open Escalation Policies and choose Create Policy.
- Enter a unique name of at least two characters.
- Describe its service or operational purpose.
- Create and open the policy.
A policy can be saved without steps, but it cannot page until a valid step exists.
2. Add the first step
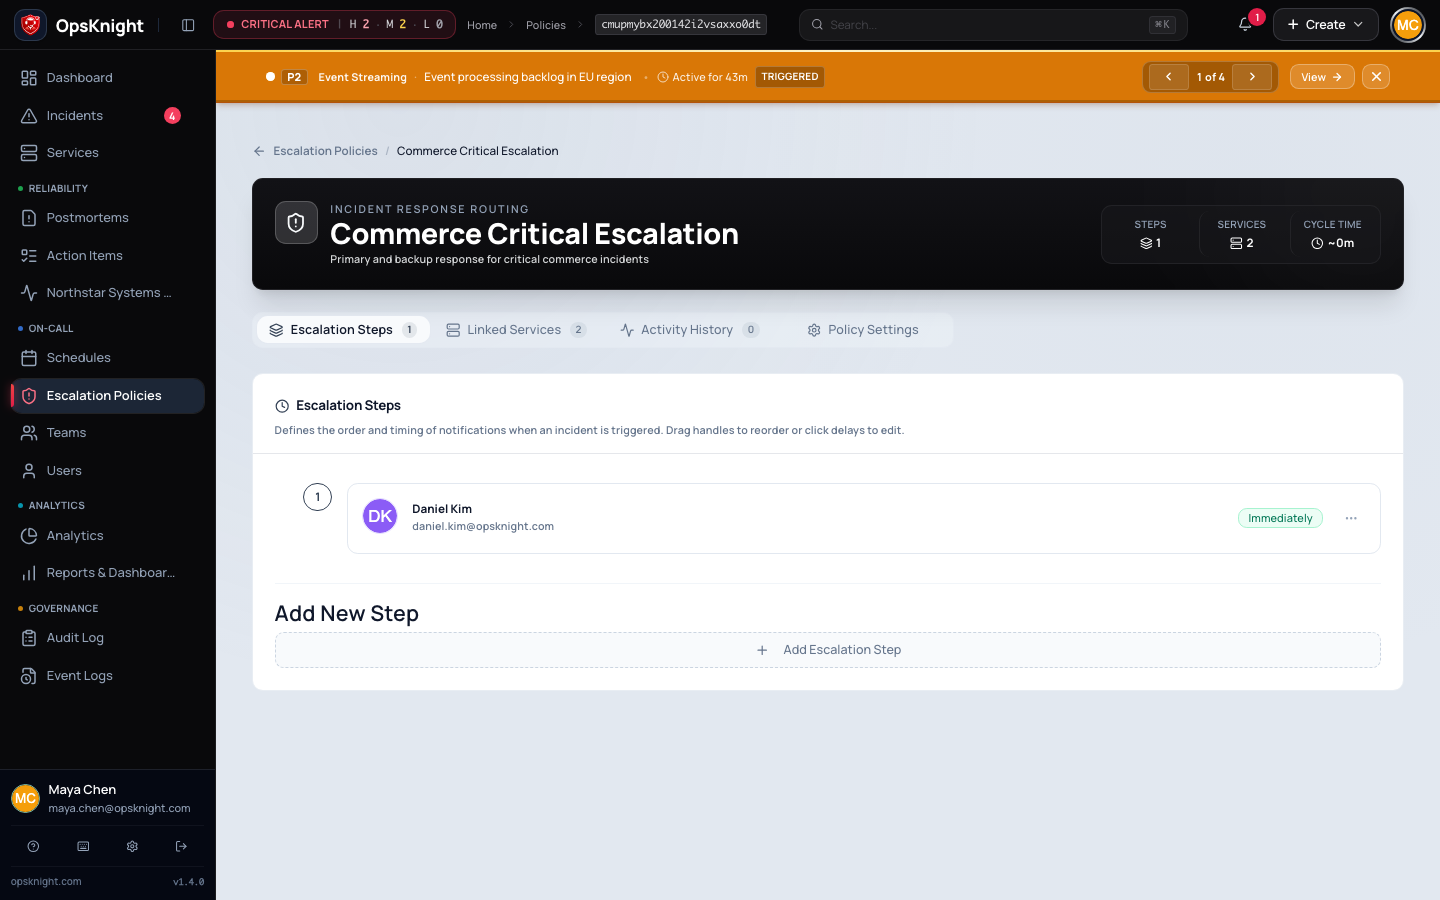
Under Steps, choose Add Escalation Step and set:
- Target Type: User, Team, or Schedule (On-Call).
- Target: the exact object to page.
- Delay:
0for immediate paging. Values are whole minutes from 0 through 10,080. - Conditions: optionally match priority, urgency, or support-hours state. A step supports at most ten conditions.
- Notification Channels: Email, SMS, Voice Call, Push, and/or WhatsApp.
- For a Team, enable Notify only team lead only when the lead should replace normal member fan-out.
- Choose Add Step.
Selected channels are an allow-list. Delivery also respects recipient preferences and requires a configured endpoint.
3. Add fallbacks and verify timing
A practical starting sequence is primary schedule at 0, backup team at 5, and incident commander at 10. Each value is the wait before that timeline position; the policy header shows total duration. OpsKnight advances while the incident remains unacknowledged.
Drag steps or use move controls to reorder them. Delays belong to timeline positions during reorder, so re-check timing after every move. Edit a step to change its target, conditions, channels, or delay.
4. Attach it to a service
- Open Services and select the service.
- Open general settings and select the policy under Escalation Policy.
- Save, then confirm the service appears in the policy's Linked Services tab.
An unattached policy never runs. A service with no policy, or a policy with no steps, cannot start policy-based paging.
5. Test the route
- Create a test incident whose priority, urgency, and support-hours state match the intended step.
- Confirm the first target receives the expected channel.
- If safe, leave it unacknowledged long enough to verify the fallback.
- Acknowledge and resolve it, then inspect delivery details and the policy's Activity tab.
Targets resolve at execution time. Matching steps run in displayed order, and paging stops advancing after acknowledgement.
Troubleshooting
No notification: confirm the policy is attached, has a matching step, and the incident remains unacknowledged.
Schedule resolves to nobody: check effective coverage at the incident time. An existing schedule still needs an active layer or override and eligible responder.
Team reaches fewer people: check active membership and Notify only team lead. If enabled, verify the lead is active.
One channel fails: check recipient preferences, destination data, provider configuration, and incident delivery details.
Conditional step is skipped: compare the incident's actual priority, urgency, and support-hours state with every condition.
Policy cannot be deleted: reassign or remove it from every linked service first; OpsKnight identifies the blocking services.
Last updated for v2.0.0
Edit this page on GitHub